How to sell my art – easy way of making prints of your artwork
 Have you often wondered ‘how to sell my art?’ There are several directions you can take to sell your cartoons as any artwork lends itself to a multitude of merchandising products.
One of the easiest ways is by creating cartoon prints for sale and also selling the original artwork which can be highly profitable and provide a steady source of income.
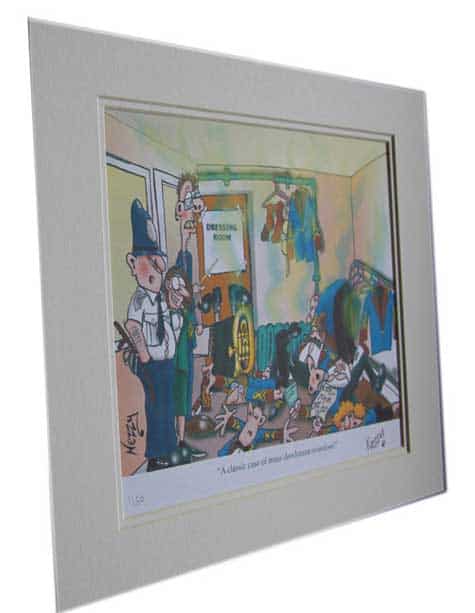
Presenting your artwork in a picture mat (or picture mount) places your artwork in a nice neat and professional package ready to sell. Thats the easy part as getting customers to buy is another story. However, well packaged and presented cartoon artwork is the basis for getting your foot in the door.
There are three basic products you can create:
- Original (‘one off’) artwork
- Limited Edition Prints
- Basic prints
Original cartoon artwork
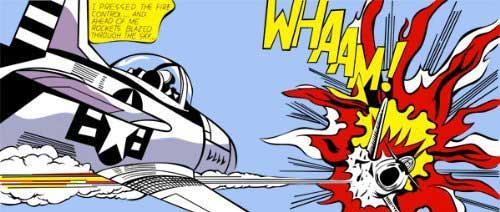
For a single image this commands the highest price as it is a ‘one off’, original piece of artwork. Just think of Roy Lichtenstiens ‘Whaam!’ – a print can be acquired cheaply but the original!!!
That’s the good part…now the downside. When you create a ‘one off’ it can be very time consuming to keep creating originals. In the long run not a good business model unless you have a large fan base that will be prepared to buy at a premium. This, in my opinion, should be run in tandem with selling prints and maybe limited edition prints so that you have the best of all options.
 Limited edition Prints
Limited edition prints are copies of the original artwork but strictly limited to maximum available number. The limited edition can run from a few to several thousand. This number is up to your own judement and preference.
As a rule of thumb the smaller the limited edition run, the higher the price as scarcity raises the price – a simple rule of economics. This provides added value for the seller and the purchaser and many limited edition prints are purchased as an investment particularly when the artist is well known.
Limited edition prints work best if you have a platform to sell them and either have some notoriety in the cartooning world or have cornered a niche market.
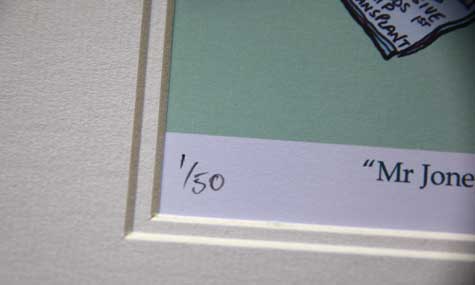
Where to place the limited edition number, signature and caption or title
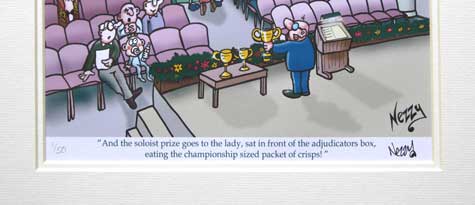
There is no hard and fast rule and I have adopted a method that works for me and seems to be a general standard adopted by other artists. I place the limited edition number in pencil (e.g.1/50, 2/50 etc…) on the bottom left of the image. This number is what makes the print unique for the purchaser and it is vital that you keep a clear record of sales and numbers. You don’t want to sell two numbers the same!!!
I place my hand written signature in black ink on the right hand side to balance things out. You need to sign the print personally even if your signature is already on the print.
The format can vary – it’s up to you as there is no official rule book on limited edition print format that I have ever seen. Some artists do it all in pencil, some all in pen. Some, like me create a blank area with the caption or title under the artwork and use this area to create the limited edition number and signature as I have above. Others prefer to sign the mat board.
I have reservations with this method as customers often like to change the mount board (as it may not match the frame/ room color scheme they have in mind. It’s entirely up to you.
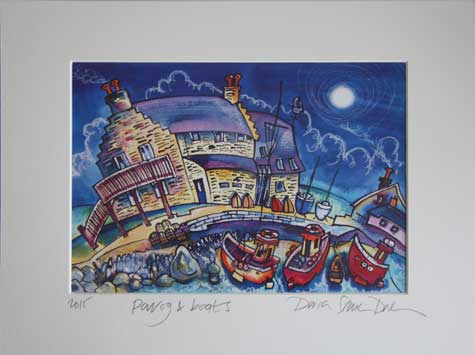
The Welsh artist Dorian Spencer Davies signs all his artwork on the mount in pencil and it looks great in the frame – I can confirm that as I bought this one from him. The above example is not a limited edition print (just the year of creation on the left) but it gives you an idea of what you could do.
The other advantage of this method is that you can be a bit more ‘flamouyant’ with your signature and lettering which I believe adds to the appeal when you have decent handwriting.
Prints
These are the least saleable as they are neither scarce or original. On the other hand you can print off as many as you can sell as there is no limit If you hit paydirt with a print that takes off you have no limiting restraints.
Prepare and package your art in house or do you outsource?
Whether you are planning to sell original, limited edition or straightforward prints you should have them presented in a picure mat (mount) to provide a professional finish. But is it better to do it yourself or get someone to do it for you?
The advantages of outsourcing are:
- You can have any size picture mat you want (as they can be cut to size)
- You don’t have to learn how to do it
- You don’t have to do it
- You don’t have to buy the equipment and stock to do it
Sounds good?
The disadvantages of outsourcing are:
- Higher cost per unit
- Lack of control – outsourcing puts reliance on the person providing the service
- Time scales to get the artwork prepared – you at the mercy of the service providers own business schedule
- Travel time and costs to take the artwork to and from the service provider
Personally I would only outsource when the volume of sales became unmanageable to do myself or someone asks for an odd size that isn’t available ‘off the shelf’. If you do go for outsourcing – a cautionary tale…
I created an odd sized watercolor cartoon and took it to a local framing service that I had not used before. I asked for a double picture mat with backing board and cellophane wrapping. I was assured that it would be done to a high standard and away I went smugly thinking it would look fantastic.
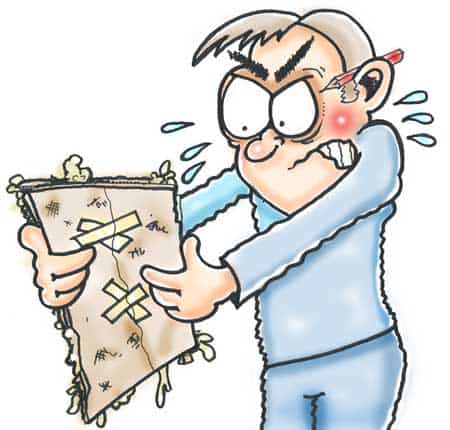 I returned the next day and to say it was a disaster would be being kind! The picture mat was not square and had ragged edges. It appeared to have been cut with a chain saw. The mat and backing board were different sizes and out of alignment. The was not one 900 angle to be seen and there were creases in the mat and backing board where it had obvoisly been bent excessively. There were pencil marks on the front and solid glue globules poking out of the uneven edges. The cello wrap was haphazardly cut, dirty and was casually stuck on the back with carpet tape. I was unable to complain as I was speechless at such pathetic workmanship and was told that it would look ok in a frame.
Luckily there was no damage to the original artwork and after extracting it from the mess I took it to another framer who, thankfully did a wonderful job. I just about managed to make a profit and learned a massive lesson in the process – get the best framer money can buy and try them out first…or do it myself!
I have opted to do it myself. The outlay for the equipment and stock didn’t to break the bank and I am now in full control of the whole process and there is no-one to mess it up but me.
Advantages of DIY:
- You are in full control
- There are no time constraints – you can do it whenever you like
- Costs are lower
- You are in charge of quality control
- You get exactly what you want
- You don’t need to travel to a service provider
- You can provide the service to other artists (I don’t but it is another way to earn money).
To me it’s a no brainer and it works really well for me.
What equipment and supplies do you need to create your own mount presentation packaging?
The initial outlay is realatively small and if you are starting to sell your artwork you can quickly make your initial outlay back and move into profit.
Before making any purchase take a step backwards and consider what size and finish you would like to sell.
Artwork sizing
You will make more money if you buy picture mats and backing board in bulk. I usually buy in boxes of 250 of a precut custom size that I have chosen. It is a restriction of a sort as I buy boxes of a pre-set size which has a knock on effect when I produce the original artwork. It’s not a big deal as graphics software can take care of any resizing issues.
If you have a standard printer you need to consider the maximum size of the print area as this will have a bearing on the size of the picture mats. The following example is my standard print and mat sizing. This allows me to print on a standard printer using international paper A4 size. I could have bought a larger printer but for me this works and saved me buying a new printer and ink stock.

The external print mat is 335mm x 228mm which fits a standard frame European size of 12″ x 10″ (I sell most of my brass band prints to the European market). it should be noted that there are variations between the US and European standard picture frame sizes if you are intending to sell globally.
Does a standard size picture mat really matter?
The outer dimension of your picture mat should fit a standard sized frame. Why? – to make it as easy as possible for your customer to put the mount in a frame. If you make the picture mat an odd size your customer will have to get a custom size frame made which adds a considerable amount of inconvenience and cost. Make it easy for them!
Initial considerations:
- Choose your print size
- Choose a standard frame size
For the US market either 9″ x 12″ or 10″ x 13″ with an aperture size (print are displayed) of 7.1″ x 8.5″ which roughly equates to the European aperture size that I use.
I sometimes outsource the actual printing as ink is often an expence that gets overlooked. I can also get a mat or glossy finish with an outsourced printer that I cannot achieve as effectively on my own printer. It is worth shopping around to compare outsourced printing with DIY.
If you do decide to print your own get the best ink. It is a false economy to use cheap brands. I know this from experience of using cheap and cheerful ink cartidges which have resulted in cheap and nasty results so beware!
 Single or double picture mat?
Your choice of single or double picture mat is again down to personal preference. I believe that a double mount gives the finished product the edge as it looks more substantial and for me looks much better than a single.
With a double picture mat the outer mat should be around 3mm larger on all sides of the aperture opening than the inner mat. This gives a nice neat finish. You can play around with various sizes to get the gap that suits your style of art. I have tried several sizes and found that if you go too small the ‘double mat’ impact is lost and too large tends to lead the eye away from the artwork.
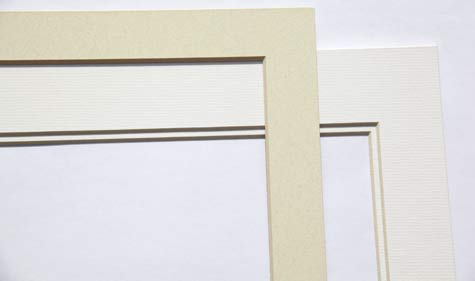
Selecting the right color for your picture mat
Neutral colors are always the safe option for inner and outer mat and I tend to go for a light cream with both mats matching. You might think this is pretty boring artistically. However, from a selling perspective neutral colors always sell better as they will generally fit in with most frames and the room color scheme of the purchaser. If you think your art deserves bright green mats then go ahead but just bear in mind you have to find like minded customers.
As sales increase you then have the option to offer different picture mat color variations and I have seen some great combinations of inner and outer mat colors that work really well together such as black and red . It also depends on the type of artwork that you are selling so there is a lot to think about. The bottom line is ‘will it sell!’
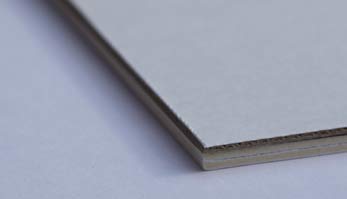
Backing board to seal in the artwork
Backing board is placed on the reverse side of the picture mount and has a dual purpose. It seals in the artwork and also gives a nice professional look to the finished product. backing board is usually made of cardboard or platic or a composite board with both cardboard and plastic.
I use backing board as it looks much neater and protects the artwork. you don’t have to use backing board particularly if you also offer a framing service as the board will never be seen once in the frame. I sell all my cartoon artwork unframed so it needs to look at it’s best. Just consider selling your artwork unframed and the tape and reverse side of the artwork can be seen – not good visually!
Backing board is relatively inexpensive and can be sourced from the same supplier as the picture mount. I generally use a neutral color that matches the picture mat to keep things simple, clean and professional on the eye.
Glue guns and double sided tape
The backing board is attached to the picture mat either with glue or sticky tape. A glue gun is a very useful basic electrical tool which heats a solid tube of polyurethane glue till it melts. The molton glue is applied to the surface of the backing board/ picture mount and controlled by a trigger on the gun.
 It is relatively cheap and easy to use, however there are a couple of drawbacks. The glue sets fairly quickly and you have to work fast, which takes practice and skill. If you are taking too long it can set before you have aligned the picture mat and backing board and you may have to start over.
The other issue is that molton glue is extremely hot and will scold your skin if you are not careful. I don’t have any problems using a glue gun and it didn’t take long to master it so don’t be put off.
My favoured method of attaching the backing board is with double sided tape, which although more expensive than a glue gun (in the long term) is easier to use. The tape can be laid out on the back of the picture mat with high accuracy and without having to rush. It’s horses for courses but in my case I prefer double sided tape over a glue gun as I believe finish is more important than speed.
N.B Never use a glue gun to attach your artwork to the picture mount as it is fraught with danger and if the artwork needs to be repositioned or put into a different mat you will have problems removing the artwork (as it will tear).
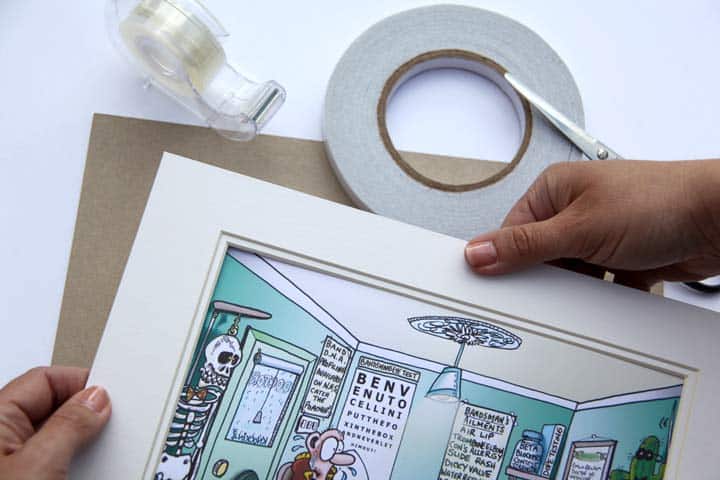
How to put the artwork, picture mat and backing board together
- Place a large clean sheet of paper on the worksurface to keep the work area in mint condition free from dust, coffee stains etc.
- Check that you have printed the image at the correct size to fit the picture mat aperture. I always make my printed images 2mm larger on all size than the actual aperture which gives a margin of error and is much easier to work with.
- Cut the artwork allowing a 1″ minimum border of white space around the image. This will provide rigidity when attaching the artwork to the back of the picture mat.
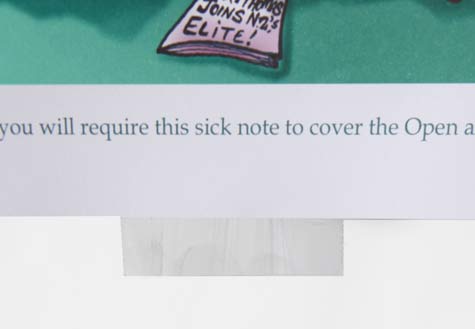
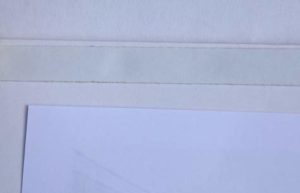
- Place a short length of scotch tape to the mid, bottom rear edge of the image with half the tape stuck to the image and the other half facing up above the image (see image below). Repeat with the top rear edge ensuring that the arwork and tape are lying flat and face up.
- Carefully position the picture mat above the artwork so that the image completely fits and aligns the aperture.
- Apply downward pressure on the picture mat to join the artwork to the may (best to use a clean sheet of paper between your hans and the mat while doing this).
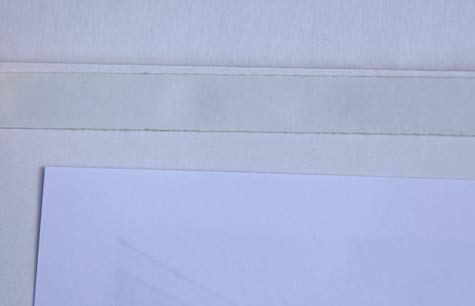
N.B. Framers generally advise you to use one point (or hinge) to apply the sticky tape to avoid distortion from moisture. I have had no problems using two points and find it more secure.
 The next stage is to add the double sided tape to the back of the picture mat. Apply double sided tape to the outer edges. I would advise keeping the tape 1-2mm from the edge to achieve a good clean finish.
 Position the backing board over the back of the picture mat and press lightly together (don’t forget to keep the clean sheet of paper between your hands and the backing board).
If you have taken all the correct steps you should have a really professional finish with neat edges!
N.B. It is always handy to have a very sharp knife to trim off any glue globules and tape. Just be aware to have the correct cut resistant safety gloves so you don’t end up trimming your fingers!
Packaging your prints for sale
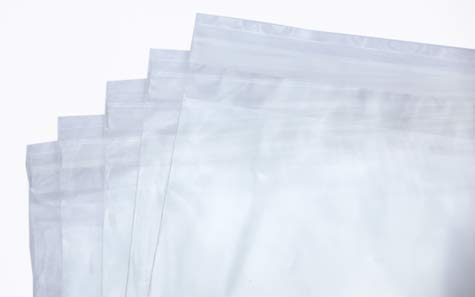 Cellophane (cello) bags
Cello bags are by far the easiest, cheapest and most effective way to present and keep your artwork clean and protected. You could go down the shrink wrap route but I find this cumbersome and doesn’t look as good.
It takes a couple of seconds to pop your finished print in a cello bag so why add another layer of work? Cello bags are also easy to open if you need to add a lyer in the bag or take the artwork out to show someone. Shrinkwrap does not allow this.
How much do cello bags cost? This varied depending on what qauntities you by them in. However it is a minimal and insignificant cost copared to the overhead profit.
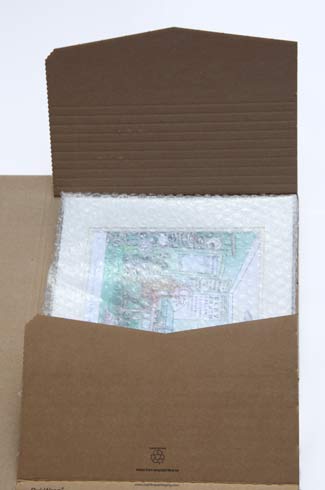 Cardboard mailers for shipping
Shipping your artwork can give you nightmares. What is it gets bent and damaged? I have been mailing cartoon artwork for a number of years and use carboard mailers. These give a great level of protection and I have never had one instance of damaged artwork.
I have seen other artists who use jiffy style mail bags but I feel that this is not robust enough. The cost per mailer (when bought in bulk) is well worth the peace of mind.
I also reduce the risk in my favour by adding a layer of bubble wrap to provide more protection. You can get bubble wrap in different grades and size rolls.
So far so good – I have never had to deal with a damaged product due to shipping problems.
How to sell my art – conclusion
So there you have it – creating a professional finish for your cartoon artwork is relatively easy, inexpensive and very satisfying when you see the finished product that you have designed and packaged tourself.
If you are looking for a way the best way sell your artwork all you have to do is take the first steps and create a professionally packages product so take action and go for it. What I haven’t covered here is marketing your artwork which I will do in a future article.
I hope you have found this article useful and informative. Perhaps it has given you the inspiration to start selling your own creations.
If you would like to be notified of future articles please stop by and sign up for the Procartoon.com Newsletter