Sell Your Artwork With Dye Sublimation Products
 One of the best ways to sell your artwork is to replicate it on everyday products that people will buy. Sublimation designs on coffee mugs and T Shirts can really sell. This opens the possibility to give any cartoonist another outlet for additional income.
You can either use a wholesale printer supplier or produce your own products and it’s a lot easier than you may think.
Using a wholesale outlet has great advantages as you don’t have to get your hands dirty in the production process. However, there are some real financial benefits from shirt and mug designs doing it yourself. Buying through a third party usually requires bulk buying and at a higher cost.
Set up Your Own Sublimation Printing Company!
You don’t have to leap into a printing business but you could start to print your own mugs and tee shirts as a sideline on a small test scale to suppliment your existing art sales. Here are the pro’s and con’s of printing your own:
Advantages:
- Complete control over what you print
- Print when you like at any time of the day
- Know your costs and profit margins in advance (suppliers often change without notice)
- Print on demand
- Don’t need to stock large quantities
- Adapt immediatly to a new fad or demand
- Control of quality control
- Cost per unit is lower over time
- No need to pay shipping costs for materials or collect from an outsource printer
- You sell your artwork – not someone else!
Disadvantages:
- Space is required to print, pack and keep a stock of blank products for printing
- Initial outlay to purchase the printing equipment, materials and blank stock to print on
- Time setting up the printing process
- You need time to print, process orders, package and ship.
As you can see there is more to be gained from doing your own printing and the unit costs can be prohibitive if you outsource the printing. It also takes the guess work out of your projected sales. Imagine you decide to produce a line of mugs featuring your own designs and decide to sell them on Ebay or Amazon.
How many are you going to sell your artwork? You could sell thousands or you might not sell more than a handful. the problem with outsourcing your mug design to a sublimation printing company is that to make it viable you may have to buy in bulk. You could be lucky and sell out but without knowing you could end up with a house full of unwanted mugs.
If you DIY the mugs you can either produce them as they are ordered or make small batches to test the water. Mug and Tee Shirt printing is not complicated and both processes are basically the same with a variation on the heat press. Lets get down to the nitty gritty…
What is sublimation printing?
Sublimation is where a solid turns directly into a gas without passing through the liquid state. In the case of sublimation printing, special inks are heated turning directly into a gas which bonds with the surface of the material you wish to print on such as a mug or tee shirt.
In the following short video you can see how a tee shirt is printed quickly and easily on a heat transfer press. The solid image is transferred to the tee shirt surface when heated and bonds with the polyester material.
How Does the Sublimation Printing Process Work and What Equipment is Required?
If you want to print your own designer products you will need the following:
- Computer with graphics software such as Photoshop Elements
- Sublimation printer and sublimation ink
- Heat press
- Sublimation transfer paper
- Heat resistant tape
- Blank products such as blank mugs and tee shirts
- Packaging for shipping
Graphics software
Graphics software is essential to be able to create, layout and print your designs. I generally use Photoshop and Photoshop Elements which allow me to import scans (pen and paper designs), color and shade and add lettering. Is design software essential? – Unfortunatly yes as the printer has to be connected to a computer to give it the necessary instructions of what to print. The only viable way to do this is with graphics software.
 If you are unfamiliar with graphics drawing software and need to learn how to use it I would recommend Lynda.com as a fantastic learning resourse with hundreds of different high quality courses. You can try before you buy and there is a free 10 day trial before a monthly membership kicks in. Youtube is another great resource although you may find it difficult to get a qaulity course. Once you have the basics of Photoshop you can get down to designing your own products
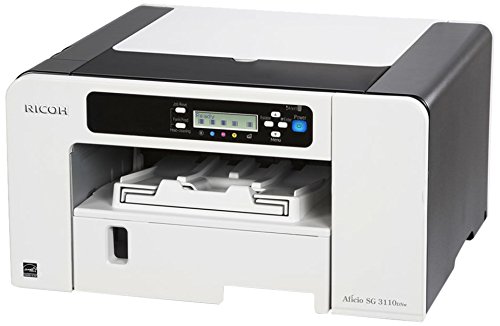
Sublimation Printer
A sublimation printer is basically the same as an inkjet printer. The difference lies in the special sublimation inks. Sublimation ink contains special pigments suspended in liquid.
When heat and pressure is applied between the printed design and for example a mug, the ink ‘sublimates’ directly from solid to gas and bonds with the polymer coated surface of the mug. In other words it creates a mirror image of the design and embeds it into the polymer surface.
There are several brands of sublimation printers and I use a Ricoh Color Gel Printer which I bought as part of a mug and tee shirt printing startup package. I have found this very easy to set up, use and produces outstanding prints. In this article I use demonstrate this particular printer.
Get the latest price for the Richo Color Gel Printer here…
Sublimation Transfer Paper
Normal paper does not work effectively for sublimation printing and a special paper is needed to carry and transfer the ink to the products surface. Sublimation paper is specially coated on one side to allow the heat transfer of ink to take place. The paper normally comes in batches of 100 sheets with the coated side and brand name on the reverse (to allow you to distinguish the correct side to print).
I recommend Texprint Sublimation paper which I use and have had great results with. If you use the link below you also get a free roll of heat resistant tape.
See the latest price for Tex Print sublimation paper here…
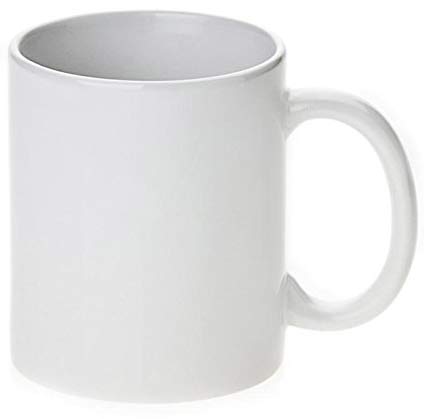 Blank Sublimation Mugs
Sublimation mugs are generally white in color and have a poly resin coating that will allow the sublimation ink to embed into the surface. I use a basic 10ozs cylindrical mug but there are a multitude of other designs, shapes and sizes. However, if you go for other mug sizes you will need to buy additional equipment to be able to heat press the designs to fit.
Heat resistant sticky tape
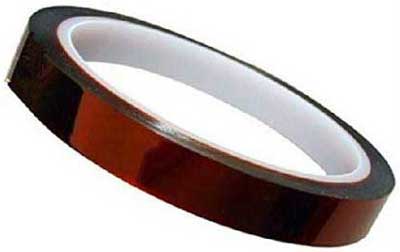
This is similar to Scotch Tape but as the name suggests is resistant to the high temperatures that are reached the sublimation process. Tape is needed to secure the printed design to the mug surface and is unaffected during the sublimation process.
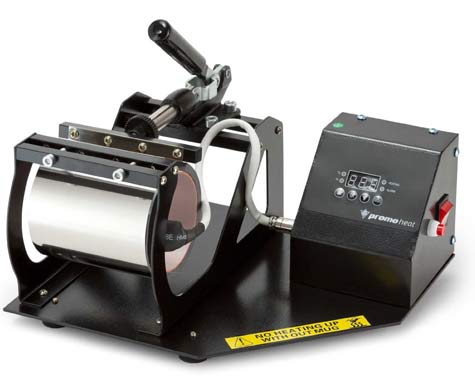 Mug Sublimation Heat Press
The heat press does exactly what it says on the tin. It heats the mug and design to a temperature that sublimation can take place and presses the paper design tightly onto the surface of the mug.
It is a very basic piece of equipment with a wrap around heating element to surround the mug, plus a control unit to regulate time and temperature.
At first you may find this a bit tricky to master. However if you follow my instructions you should easily get the hang of how long to keep the mug in the press at what temperature – it’s not rocket science!
See the range of mug sublimation heat presses available on Amazon
Packaging for Your Products
To sell your products you will need packaging and this is an area that needs careful thought to ensure the mugs arrive in pristine condition to the customer. There is purpose made packaging for mugs which will keep them secure and safe during the rigours of shipping. You can buy packaging in smaller bulk from Amazon.com and Ebay.
Setting up Your Mug Design in Photoshop
The print area is dictated by two things:
- Printable area on the mug
- Size of the wrap around the heating element of the hot press.
Make sure your mug fits inside the heating element with room to spare. Heat dissipates at the edges of the heating element and if you have chosen a mug size that is very close to the size of the wrap tound heating element you could have problems with insufficient heat and sublimation on the extreme edges.
With a standard mug size you shouldn’t have a problem. Just bear in mind that you should leave a small margin (about 3mm) at the top and bottom of your mug for the same reason i.e. heat may dissipate at the edges of the mug. With a 10 oz mug I create a 190mm x 80mm print template. It produces a nice print area with crisp detail right to the edge of the print area.
Setting Up Your Sublimation Print With Graphics Software
I use PhotoShop or photoShop Elements and the principal is the same for both. I haven’t gone into other graphics software types because there are so many but I believe this method will be more or less standard accross the range. The following assumes you have a reasonable knowledge of your software:
- Open File/New/Custom
- Give the file a name e.g. ‘Mug Template’ (which you could use again for a different design)
- Insert the dimensions e.g. 190mm x 80mm
- Set the resolution to a minimum of 300d.p.i. which is the basic print industry minimum standard.
- Color mode should be RGB
- Make sure the background is set to white
The box you have made the adjustments in should now look like this
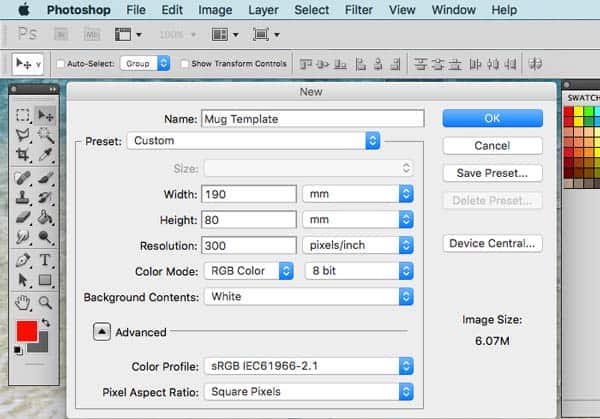
With this set up – Click ‘OK’ and your blank template is ready for adding the artwark.
Tip! – Save this in its blank format so that for your next mug design you have a blank template ready to go.
Creation of the mug design
Open up the artwork that you want to go into the design. Using the layers pallete you can add each element of your design into the blank template and resize/ reposition as necessary.
I am not going into the process of how this is done as I am assuming you have the basics of how to do this using ‘Layers’. If you are not familiar take a look at my article on working with layers which will give you an overview of what layers can do.
Here are a few pointers on setting out the design layout:
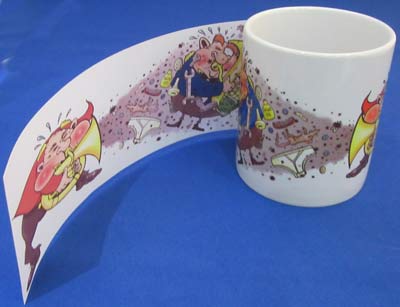
- A mug is cylindrical so you cannot view the whole design at once. Because of this you can repeat some or all of the design such as the same cartoon character on either side of the mug.

- Consider the ‘white space’. In the design above I added a background of musical notes. I set the opacity level at about 30% so they wouldn’t overpower the main design and lettering but were visible enough to take away the boring plain white background and I think it works. (the opacity setting is at the top of the layers pallet. Select the layer you wish to alter and reduce the opacity).
 Add any lettering you want and size to suit. There is a great library of different fonts and effects either within PhotoShop or available free or to buy online.
- Play around with the design until you are happy with it.
- If you are using photographic images in your design you may want to tweak the brightlness levels which is easy in Photoshop. If a photo is slightly on the dark side it generally won’t produce a good image after sublimation.
Reversing the Mug Design Before Printing – Avoid a Common and Fatal Error!
- The last part of the process is to reverse the design so that it will print the ‘right way round’ on the mug. The number of time I have forgotton to do this is unreal and heve ended up with a bin full of backward reading mugs!!! Again this is easy in PhotoShop – Image/Rotation/Flip Horizontally.

Printing Your Sublimation Design
You should have read the instructions that came with the sublimation printer to guide you through the settings. They are basically the same as a conventional inkjet printer except the control panel usually offers more control over color and quality.
I usually set my printer (Richo Color Gel) to the highest quality level which has also proved to be ok with the volume of ink used.
Load up the sublimation paper ensuring you have the correct side up! Sublimation paper can only be pinted on one side which. The reverse side normally carried a logo or is slightly darker in color. Just refer to the instructions that came with the paper or refer to the manufacturers website.
Print off the design (you can save on paper by printing two designs per sheet in landscape format) then cut to exact size
 Attaching The Print To The Mug
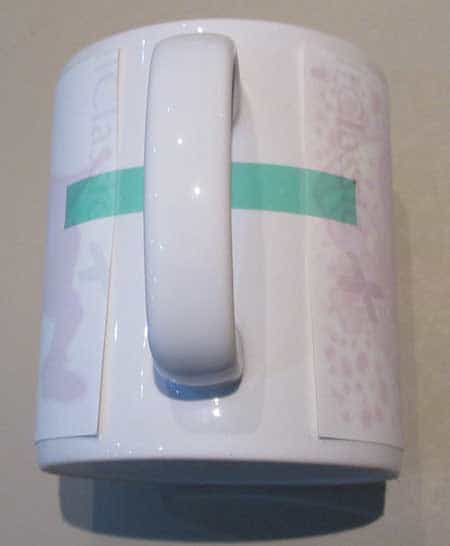
Your mug should be perfectly clean and dry before attaching the design. Cut a small strip of the heat resistant tape and attach it to the back of one of the short edges of the design.
Wrap the design aroind the mug so that each short edhe is an equal distance from the handle and there is an even gap between the top and bottom of the mug. Push the tape through the handle and attach to the other side of the design to hold it firmly in place.
Setting up The Mug Press For Sublimation Printing
 READ THE INSTRUCTIONS!
This isn’t me being patronising! I was so eager to print my first mug that I ended up with quite a few in the bin and burnt my thumb in the process. So please read the instructions and bear in mind that this piece of equipment gets very hot (around 200oC) as does the mug in the press.
Mug Press Settings:
- ‘Idle’ temperature = 100oC
- Target temperature = 185oC
- Set the timer to 140 seconds
Idle temperature is the temperature that the mug press will stay at until you are ready to print. The target temperature is the maximum temperature that the press will reach i.e. the ideal cure temperature. The timer setting will kick in when the target temperature is reached and 140 seconds later will give a loud ‘beep’ to tell you it is time to remove the mug and let it cool down.
Optimum Time / Temperature to Place the Mug in the Heating Element
The one factor that wasn’t in the instructions was ‘when to put the mug into the press’. Through trial and error I got the best results when the heating element was set to go and had reached 170oC. I then load the mug in the press clamping it firmly in place. There will be an initial drop in temperature (as the cold mug draws heat from the press wrap) and then it will steadily rise to the target temperature.
You will then see the 140 second countdown appear on the mug press LED readout. As soon as it ‘beeps’ unclamp the press and switch it to idle (or off). Take the mug out by the handle and place on a heat proof surface (I use a silicone mat).
Peel off the heat resistant tape as soon as possible (remember the mug will retain heat for quite a while). Once off you can run the mug under cold water to cool it down to room temperature.
Voila you not have a sublimation printed mug!
 Are Sublimation Mug Designs Dishwasher Proof?
If you decide to make money from your mug designs just be aware that dishwashers will eventually degrade the design on the mug. Sublimation prints on mugs are dishwasher proof for a very limited time before the design begins to fade.
The simple answer is to advise your customers to hand wash their mug rather than place it in the dishwasher to preseve the clarity and vibrancy of the design. I have always done this and have never had a single complaint. If you hand wash the mugs they look as good as new for years.
I put a small printed warning on a slip of paper in each mug before shipping to ensure this angle is well and truly covered. If you claim that the mug is dishwasher resistant or ‘dishwasher proof’ then you are letting your customers down and opening the door for complaints.
Finding outlets to sell your artwork – where can you advertise and get customers for your designer mugs?
There are quite a number of ways to do this and they will vary in success depending upon your budget, target market and market research. Here are a few suggestions.
Sell your artork on your own web site
If you already have your own web site which is relevant to the products you are selling then its a no brainer. You can set up a gallery/ shop quite easily and taking payment has never been easier with services like Woo Commerce, Shopify and Paypal.
If you don’t have a web site read on…
Selling Your Artwork Through Facebook
If you don’t have your own web site and are thinking of getting one it may well be worth looking at the alternatives first. Facebook lets you test the water before investing time and money in a web site. Web sites and social media may seem like a chicken and egg scenario but social media usually comes first. Social media gather interest and momentum before venturing into a web site to funnel that interest.
When I sell mugs I generate interest on a Facebook pages which were then set up to be linked to my websites. The first year Facebook definitely gained me the most traction. I know several artists who use facebook exclusively and it works!
One way to take the risk out of the equation is to refer your Facebook fans to a third party. Etsy are ideal (see below) and for small commission rates display your art products for you worldwide. They will also take care of taking payments on your behalf.
Selling Your Designer Mugs on EBay
Ebay is a low cost way to sell directly and has a huge market. Fees are relatively low as is the risk. You can sell as many or as little products as you like with the option to sell at a fixed price, offer price or at auction. It really is a great way to cut your teeth when selling directly.
Selling Your Designer Mugs On Amazon
Amazon is the number 1 sellers market on the planet. However there is quite a lot more to this than meets the eye. You and your products will have to meet Amazons stringent rules on selling and unlike Ebay there is a monthly fee if you wish to join the Amazon by Fullfillment Program.
This is where Amazon hold your stock at their warehouses and ship direct to the customer for you. They also process orders and returns. but is comes at a cost per month.
Once you have established that you have a viable market to sell your artwork then Amazon is the place to go. The rule of thumb is that the sales price of your product is split in three. Amazon take around a third, the product and production costs will cost around a third and you will make a third.
This can vary slightly but you really have to work out the financial nuts and bolts before selling on Amazon as you can make a ton of money or (if you don’t do your research right) lose a ton!
Selling Your Unique Artwork on Etsy
Etsy is a sellers platform designed to attract customers who want to buy items thay cannot generally find elsewhere. They stipulate that …Everything listed for sale on Etsy must be handmade, vintage or a craft supply.
This is a great place to sell your own original designer mugs and there are no upfront fees. You open a shop, upload your product pictures, descriptions and pricing. Etsy does a really nice job of presenting your shop globally. Etsy charge fees for listing each product, a transaction fee, and a payment processing fee.
Again I know quite a few artists who use Etsy and are very happy with the whole experience. Because Etsy is a global entity you have the world looking at your artwork
Check Out Selling on Etsy here…
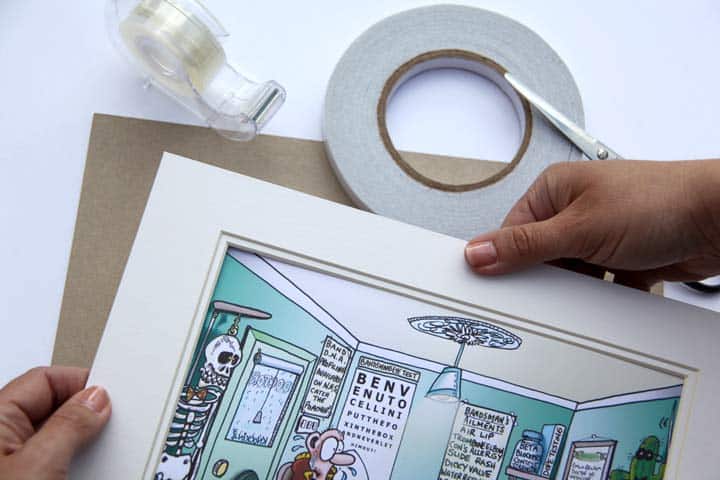 Looking To Find Other Ways To Sell Your Artwork?
The best way to present your print designs is to mount them with backing board in a cello bag. A clean and easy way to display and ship artwork with relative ease and little outlay.